
Hello and thanks for visiting!
Today's card is for the #tgif challenge 351, a fun sketch challenge! Please click on my card or the tgif challenge image to visit their blog for lots of inspiration!
 |
| Click on the card to visit #tgifc351 |
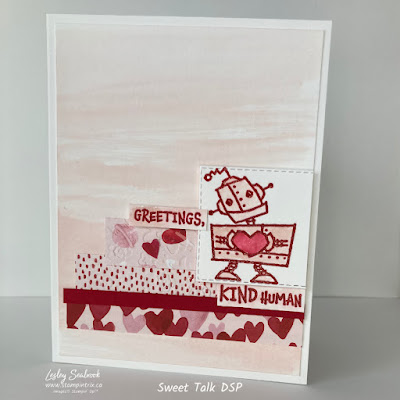
I love monochromatic colour palettes, and I love the Stampin' Up!® Designer Series Papers! I was able to used leftover strips of DSP for this fantastic sketch. The DSP is from the Sweet Talk DSP pack (in the new January to June Mini Catalogue) Do you have any leftover strips of DSP in your stash? If so go make a card using the sketch as inspiration and join the fun!
 |
| Click the image to visit #TGIFC351 |
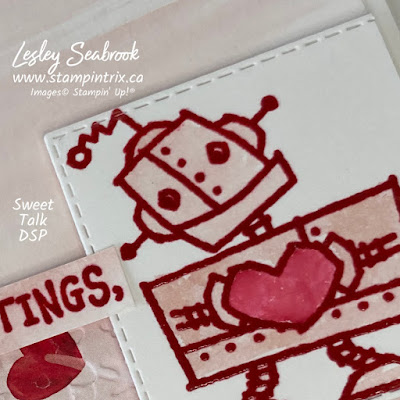
This week has been all about Colour Embossing and Watercolouring for me. Today's card is created using a Real Red Heat Embossed robot & sentiment, and then coloured in with a Blushing Bride Watercolour wash on Thick Basic White Cardstock. I've also added a watercolour wash to the background. The Sweet Talk DSP has a super watercolour wash pattern on one of the papers, but I wanted a more linear, horizontal pattern so I decided to create the background with Blushing Bride ink and a Water Painter.
For more inspiration using Colour Emboss with Watercolouring check these posts: January 16th & January 18th
For a quick idea of how to Colour Emboss check out the Pinterest Idea Pin here For more inspiration from Lesley's StampinTrix Pinterest page please click here
And here's the card details:
4 1/4 x 5 1/2 Thick Basic White card base (5 1/2 x 8 1/2 folded in half portrait orientation)
4 x 5 1/4 Thick Basic White Cardstock (CS)
3 different strips of Sweet Talk DSP: 1/2 inch x 3 7/8; 3/4 of an inch x 3 3/4; 3/4 of an inch x 3 1/4
Strip of Real Red CS 1/4 of an inch x 14/16
4 1/4 x 5 1/2 Scrap Thick Basic White CS for the Coloured Embossed & Watercoloured image and sentiment
Nuts & Bolts Stamp Set
Stitched Rectangle Dies
Ink Colours: Real Red & Blushing Bride
VersaMark Ink
Clear Embossing Powder
Water Painters
*** Click here here to shop the supplies to create this card on my online store.
Assembly & Trix:
* Apply a light watercolour wash using diluted Blushing Bride ink to the CS layer and set aside to dry.
* Using the Stamparatus™ stamp the robot using Real Red Ink. ***Trix, repeat the stamping a couple of times to get a nice deep red ink layer, it will add to the colour emboss look.
* Clean the stamp and re ink using VersaMark, ensure there is a good coating of VersaMark ink on the image. Then sprinkle with clear embossing powder and heat set.
* Create the sentiment layer the same as above, 1st with Real Red Ink and 2nd with VersaMark ink.
* Apply a Blushing Bride watercolour wash to the image and sentiment strip and set aside to dry. Colour the heart with a Real Red watercolour wash.
* Die cut the robot with a Stitched Rectangle Die.
*** Trix, determine the placement of the image, sentiment and strips of DSP first by laying them on the card base. Fussy cut the sentiment apart if you wish. Adhere all pieces to the watercoloured washed CS layer with Multipurpose Liquid Glue (glue) Pop up the robot with Stampin' Dimensionals.
* Adhere the CS layer to the card base with glue.
It's time for the freebies :)
 |
| Click the image to see the Sale a-bration products available |
*** Please remember to use the monthly Host Code when your shopping cart is $60 or greater, then I can send you a little thank you gift in the mail with your thank you card the following month. January's Host Code is VWEZDEJ4
Enjoy & have a super day!


No comments:
Post a Comment
Thanks for taking the time to write a comment, you've made my day!