Friday, October 29, 2021

a SIP card Paper Pumpkin Alternative

 Hello and thanks for visiting!

Today's card is super simple!  Stamps Ink & Paper (SIP) using the October 2021 Peaceful Christmas Paper Pumpkin Kit and our Note Cards.  The Note Card pack contains envelopes and pre-scored cards, they're super convenient! Item #159236 Basic White.

These cards are perfect for the quick cards we need to create around the holidays.  Also, consider making up a gift set for a Christmas gift, the possibilities are endless! 


*  The stamped image is the row of trees from the Paper Pumpkin kit using Shaded Spruce ink, included in the kit.  I added the wash of colour with a blending brush.

*  The sentiment strip is a piece of 1/4 Basic White Thick cardstock, (CS).  ***Trix, choose Thick Basic White for narrow sentiment strips, to ensure the strip stays level when popped up with dimensionals.

*  That's it, super simple right!  


Join my Christmas Card Kit Party via Zoom - email me at lesley@stampintrix 

Register & Pay by Nov 1st, 2021 to Join the party Nov 27th!  


First choose your kit

 Subscribe here for the upcoming Paper Pumpkin 'Gifts Galore' Kit.

OR

Choose a, Kit's Collection Kit 

OR

Choose a Take & Make Kit I have created 

 ***email lesley@stampintrix for a link to my latest newsletter and more info about my  Take & Make Kit's and the Christmas Card Kit Party


Subscribe by November 10th 2021 to receive the Gifts Galore Kit.  I'll also create cards using the supplies in the kit next month near the end of November, stay tuned :)


Click the image to subscribe to Paper Pumpkin by Nov 10th


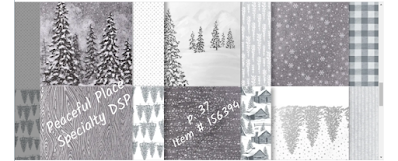
The Peaceful Christmas Paper Pumpkin Refill Kit has already sold out!  - However- you can purchase the coordinating products here Peaceful Christmas Suite Collection  


*Please remember to use the Host Code on the right side bar of this blog when you shopping is $60 or more.  Then I can send you a little thank you gift in the mail with your thank you card the following month.

Enjoy & have a super day!


Wednesday, October 27, 2021

Kylie's Top Ten International Highlights Winners Blog Hop October 2021

 Hello and thanks for visiting!  Today is an exciting day for me!  I've just learned that my thank you card entry into Kylie's  October International Highlights Gallery received 104 votes - wow thank you all so very much for voting for my card!  It is a great privilege to join the Winners Blog Hop!  Enjoy the inspiration!  Click on the blog hop list at the end of this post.


The theme for Kylie's blog hop is Thanks and Encouragement, and what's more encouraging than a hug of support for those going through tough times.  And a card is really a hug with a fold in the middle, right :)    Eden's Garden  is a beautiful new collection of products coming in 2022.  Stampin' Up!® often spoils us with a sneak peek and early release of fun new stamps and papers.  As demonstrators we were able to order the products and begin creating with them this month.  And starting in November customers can order them too!

In November, I'll be offering a 'Card Kit To Go' using his awesome suite of products, so stay tuned.  Please click on my newsletter tab at the top to receive information about this card kit at the start of November.  I think it's a versatile suite of products that can be used for Christmas cards as well!  


And here's the card details:

4 1/4 x 5 1/2 Soft Succulent card base (4 1/4 x 11 folded in half portrait orientation)

3 7/8 x 5 1/8 Evening Evergreen cardstock (CS) layer

3 3/4 x 5 Ever Eden Specialty Designer Series Paper

4 1/4 x 5 1/2 piece of Soft Succulent CS for the largest leaf wreath shaped die 

3 x 3 Shimmery White CS for label die cut shape

Eden's Garden Stamp Set

Ink:  Soft Succulent & Evening Evergreen

Seasonal Layers Dies

Eden Dies

Expression In Ink Ephemera Pack

Simply Elegant Trim


Assembly & Trix:

*  Die cut the leaves from Soft Succulent CS using the largest leaf wreath shaped die.  

*  Die cut a piece of Shimmery White using the Seasonal Labels Dies.

*  Stamp the leaves using Soft Succulent ink on the die cut shape and then stamp the sentiment using Evening Evergreen.

* Adhere gold leaves from the Ephemera Pack to the back of the die cut using Stampin' Seal.

*  Adhere the Soft Succulent leaves to the label die using Multipurpose Liquid Glue (glue).  ***Trix, cut apart the wreath shape and use two sections of leaves to add texture and dimension to the label.  Layer one section on top of the label and one under the gold leaves from the Ephemera Pack. 

*   Adhere the Specialty DSP to the Evening Evergreen layer using glue, then wrap with gold trim.  ***Trix, wrap the trim around the card tie a knot, secure with a Mini Glue Dot to keep the trim in place on the front of the card.  Then tie a bow and adhere it to the card with a glue dot.

*  Adhere the label to the card front using Stampin' Dimensionals, then adhere to the card base using dimensionals. 


Enjoy and have a super day! 

Blog Hop Links

style="font-family: Cantarell;">


Tuesday, October 26, 2021

It's Gift Time - Notepad holders

 Hello and thanks for visiting!

With Christmas gift giving right around the corner - it's time for Gift Ideas!   These super  easy post it note holders are perfect for stocking suffers :)

This holder uses the fabulous new Ever Eden Specialty Designer Series Paper!  This paper is from the January to June 2022 Mini Catalogue - yes that's right!  Stampin' Up!® always inspires us with new products that are coming our way.  As demonstrators we are able to order select products now!   Come and join our community of crafters - email me for more info lesley@stampintrix.ca  The stamp set is called Create with Friends, and I've added some gold twine for a little bling.  The card base is Evening Evergreen.


This version uses the Pattern Party Designer Series Paper (DSP) from the Annual Catalogue.

Click here, @lesleystampintrix to visit my StampinTrix Instagram to see  how this neat little notecard flips up!


And here's the details:

3 1/2 x 11 Cardstock of choice (Basic Black)

3 3/8 x 2 5/8 DSP of choice, (Pattern Party DSP)

3 x 3 scrap of basic White cardstock (CS) for the die cut shape

Joyful Life Stamp Set

Layering Circles Dies

Memento Black Ink Pad

Stampin' Blends petal Pink, Flirty Flamingo & Melon Mambo


Assembly & Trix:

*  Score the CS at 2 3/4 & 5 1/2

*  Adhere the DSP using Multipurpose Liquid Glue (glue)

*  Stamp the image on a piece of Basic White CS dies cut with a Laying Circle Die.

*  Colour with Stampin' Blends of choice, and adhere to notecard base with glue.

*  Embellish as desired (Matte Black Dots) 

*  Adhere post it notes to card base with glue.  ***Trix, ensure the score lines are well burnished so that the image section tucks in behind the post it note section.


Enjoy and have a super day!

For more info about the early sneak peeks of upcoming merchandise and purchasing the Starter Kit please email me at lesley@tampintrix.ca  I'm always happy to talk about the  Stampin' Up!® community.    Click here, to purchase the starter kit   


Thursday, October 21, 2021

Use What You Have! September Paper Pumpkin Alternative Project

Hello and thanks for visiting today! 

One of my favourite things is to take my Paper Pumpkin kits with me on vacation for easy and quick crafting with minimal supplies.  I made the September Paper Pumpkin kit called Haunts & Harvest in October :)   that's what's great about our kits, make them whenever you choose.  

Second, *use what you have on hand and mix it up, change up the contents in the kit, use it as a point of inspiration then create whatever you like with the supplies you have.  The Stampin' Up!® kits are terrific all inclusive card making kits, I love all the extra neat little surprise supplies within the kit that you cannot buy in the catalogue. 


*Use what you have* 

 I love birch bark, so I decided to add it to the card.  I think the leaves in the kit are supposed to be birch, but they could be beech or ash?  Originally I thought I'd make a yellow birch leaf but I didn't have any of our yellow inks with me.  Then I found these beautiful purple leaves that looked like Blackberry Bliss, the ink spot colour in the kit.  Perfect!


Assembly & Trix:

*  Crumple up the tissue packaging from the kit, smooth it out and adhere to a 4 1/4 x 5 1/2 Basic White card base with Multipurpose Liquid Glue (glue)

*  Stamp the leaves on the tissue paper using Crumb Cake ink.  

*  Flip the cut out leaves over and colour with ink colour of choice.  I used Blackberry Bliss & Garden Green.  ***Trix, to apply the colour I used a little piece of rubber no slip shelf liner, you know those rolls you buy to line a shelf with, they have texture, they're also great for opening a stubborn jar lid b/c they grip - sorry forgot to take a picture of it - I was using what I had available to me :)   Simply dab the rubber cloth into the ink and then dab onto the leaves to transfer the colour and add texture.  

*  Adhere the leaves and birch bark to the card with glue.  ***Trix, allow the glue time to dry securely when using different materials like birch bark.

*  Stamp the sentiment on the tags with Blackberry Bliss ink and adhere to the birch bark using dimensionals.

***Trix, unravel the paper stems from the kit, take out the wire, and twist together again and add to the tag with a knot.

***Be creative, use what you have, change up the supplies and make it your own***


Enjoy & have a super day!

Click here, to shop Lesley's online store

Click here, to shop the Kit's Collection 

Click here, to shop Paper Pumpkin kits


*****And remember to use the Host Code found on the right side bar of my blog when your shopping bag is $60 or more and then I can send you a little extra gift in the mail the following month with your thank you card :)    Host Code for October is C9REGCBY


Thursday, October 7, 2021

#simplestamping October Challenge

 Hello and thanks for visiting!

Today's card is for the Stampin' Up!® October #simplestamping Challenge.  The theme is Christmas or New Year using Stamps Ink & Paper and an Embellishment.  The 'Peace On Earth' sentiment is from Thinking Thanks & Peace stamp set.  I think this stamp set is a little hidden gem  :) 


Click here, Lesley's Online Store  to shop for the supplies to create this card.  


And here's the card details:

4 1/4 x 5 1/2 Thick Basic White card base ( 5 1/2 x 8 1/2 folded in half)

4 x 5 1/4 Basic White cardstock (CS) layer

Thinking Thanks & Peace stamp set

Night of Navy Ink Pad

Artistry Blooms Adhesive Backed Sequins


Assembly & Trix:

*  Stamp the 'Peace On Earth' sentiment with Night of Navy ink on the Basic White CS layer and adhere to the Thick Basic White card base with dimensionals.  ***Trix, the simple use of dimensionals on this white on white card is a very simple way to add impact. Try it with any colour of cardstock.  It just adds that little something with few supplies.

*  Apply the adhesive backed sequins. 

*****Yep, that's it! three steps and this little beauty is done*****


Enjoy & have a super day!


Click here, to shop the Thinking Thanks & Peace stamp set   I think it's a hidden gem!    

Please remember to use the Host Code, (found on the right side bar) when your order is $60 or greater and then I can send you a little thank you in the mail the following month with a thank you card.  The Host Code for October is C9REGCBY

*****Did you know Stampin Up!® offers a clearance Rack section?  Click here, to shop the Clearance Rack *****


Click here to shop Lesley's Online Store


Tuesday, October 5, 2021

A Peaceful Cabin Card Kit To Go

 Hello and thanks for visiting!

I recently had the great pleasure of presenting at our Demonstrator Stamp & Share Holiday 2021, hosted by Genevieve Ko & Zahra Premji.   It was terrific to create and learn together with demonstrators from across Canada on World Card Making Day!   

One of the projects I shared was a Card Kit To Go.  If you live in Canada and would like to purchase this kit please email me at lesley@stampintrix.ca   I've designed the kit for you to complete on you own time.  The kit includes half a pack of Peaceful Place Specialty Designer Series Paper, a roll of Ribbon & a Wink of Stella Glitter Brush, with the pre cut card supplies to make four cards.  I email a written tutorial with photos, and a video link of Trix and tips for creating the cards.  The kit cost is $45 dollars.  Add on the Peaceful Cabin stamp set for an additional $35 if you wish and shipping as required.

Please check out my Facebook Live video here to see how I made one of the cards.    


*****Registration & Payment is due October 10th.  

Please email me at lesley@stampintrix.ca


Click on the image to shop Lesley's Online Store

*****Please remember to use the monthly Host Code (found on the right side bar of the blog) when shopping online.  Then I can send you a thank you gift in the mail the following month with your thank you card.  The October Host Code is C9REGCBY


Enjoy & have a super day!

Monday, October 4, 2021

A Peaceful Cabin Thank You for Kylie's Monthly Highlights Gallery

Hello and thanks for visiting!

Today's thank you card come from a stamp set in the Mini Catalogue many people may thing is just for Christmas.  It's not, woohoo, Stampin' Up!® has included sentiments for use throughout the year.  Fantastic eh'  So if you took a look at 'Peaceful Cabin' in the catty, take another look see.  I've been creating a lot with this set and and will be posting a number of 'not just for Christmas' cards from this set in the coming weeks.

Also I've entered my card in Kylie's Bertucci's  Monthly International Highlights Gallery.  Please click on my card or the Vote for me button and visit Kylie's website.  If you like my card I'd love for you to vote for it by clicking the little heart in the top right corner  of the picture in the gallery.  If I'm one of the top 10 winners, then I get to join Kylie's International blog hop at the end of the month.  Thanks so much for playing along and supporting me .

Enjoy and have a super day!


Click on the image to visit Kylie's Gallery


And here's the card details;

4 1/4 x 5 1/2  Basic Grey card base  (5 1/2 x 8 1/2 folded in half portrait orientation)

4 1/4 x 5 1/2 Peaceful Place Specialty Designer Series Paper

2 pieces of 4 x 5 Thick Basic White cardstock (CS) layer one for the trees and one for the cabin

Ink:  Tuxedo Black Memento & Evening Evergreen

Peaceful Cabin Bundle (stamp set & dies)


Assembly & Trix:

*  Adhere the DSP to the card base with Multipurpose Liquid Glue (glue)

*  Stamp the cabin in Memento Ink.  ***Trix, stamp close to the top of the 3 inch side of the CS, leaving just enough room for the die cut - this allows for more space at the bottom of the card to be shifted into place with the trees.

*  Stamp the 'thank you' sentiment in Memento ink.

*  Stamp the trees in Evening Evergreen Ink.  ***Trix, same as above, close to the top of CS.

*  Line up the cabin and the trees as you prefer and adhere with glue.   

*  Adhere the cabin and trees to the card base with Stampin' Seal.   ***Trix, only use seal the base of the layer because,...............

***  And here's a neat trick, tuck dimensionals in behind the cabin near the top, and the trees near the top.  This allows the cabin and trees to be lifted off the card base just slightly to give dimension without bulk at the base of the card.  Neat trick from Patty Bennet   :)   

*  Trim off the access CS with paper snips.

Enjoy! 


A Little Latte Suite with Fun Patterns Embossing Folder

  Hello and thanks for visiting! I just had to share a couple more cards from my playtime with A Little Latte Suite, #163466 available March...