
Thank you for joining us for our Stampin' Up!® Demonstrator Training Program Monthly Blog Hop! We are so happy that you could join us today for this blog hop for ideas and creative inspiration. We are a group of Stampin' Up!® Demonstrators from around the world that are taking part in training that is helping us to build a successful Stampin' Up!® business and reach some goals we have set. We really appreciate your support.

You may be starting here or have come from another blog - either way you can find the link list at the bottom of this post so that you can see every blog post and idea today.
*** Are you Team Evening Evergreen or Team Flirty Flaming? Please leave your choice in the comments section below :)


Assembly & Trix:
There's not many Trix to these cards, they're 'Love It Chop It' with the addition of the embossing folder. And I kept it simple and simply covered the card fronts right to the edge. (4 1/4 x 5 1/2 card base)
* Cut the coloured cardstock or DSP at 4 x 4 1/4 for the bottom of the card. Emboss the cardstock with either the Tasteful Textile of the Ornate Floral Embossing Folder first. Adhere to card base with Multipurpose Liquid Glue (glue)
* Cut the coloured cardstock or DSO at 2 x 4 1/4 for the top of the card. Emboss with the Meadow Moments Embossing Folder and adhere to card base with glue
* Die cut the 'Thanks' from the Amazing Thanks Dies and adhere together with glue. *** Trix, mix up the colour combinations as you wish relative to the colours on the piece of DSP you choose. I used a bit of Pear Pizzazz for the border of the Evening Evergreen thanks because it picked up the Pear Pizzazz leaves on the DSP. It's totally personally preference :)
* Use Mini Glue Dots to adhere the ribbon to the back of the thanks and then to the card. Embellish with Brushed Brass Butterflies.


Thanks so much for stopping by today!
As mentioned at the top, this is a blog hop so make sure you 'hop' around to all the amazing projects on this hop! Click on the links below to visit them.
Blog Hop Links
style="font-family: Cantarell;">
Shopping List
Amazing Thanks Dies Item #157816
Daffodil Afternoon Designer Series Paper *Free during Sale-A-Bration
Cardstock
Evening Evergreen #155574 Mint Macaron #138337 Pear Pizzazz #131201
Flirty Flamingo #141461 Mossy Meadow #133676
Embossing Folders:
Meadow Moments #153126
Tasteful Textile 3D #152718 (for EE card)
Ornate Floral 3D #152725
Old Olive/Pretty Peacock Reversible Ribbon #149496
Brushed Brass Butterflies #158136
*** Click here to shop the supplies to create this card. Please don't forget to use the monthly Host Code when your order is $60 - $135 and then I can send you a little thank you gift in the mail with one of these thank you cards next month. February's Host Code is NZTFGAXF
Wait - so what happens when my shopping cart is over $135 you ask? :)
*** Choose $165 of product & pay $135 - no shipping or taxes (in most provinces) + 20% off future purchases - that's what! :)
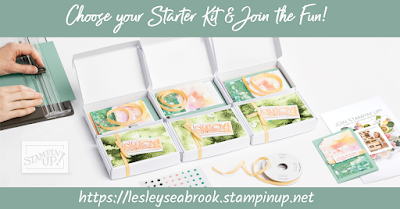
Choose to move your shopping cart items to the Starter Kit cart and Join a Creative Community of Crafters! *** Click here to Join The Fun!
It's simply the best value for the dollar. Choose your favourites as your 'Starter Kit', there is no commitment to sell or promote Stampin' Up!® products unless you wish to. I purchased the Starter Kit to save money and enjoyed a discount on my purchases for 5 years until I decided to start my online business.
 |
| Click the image to Join Stampin' Up!® |
Please email me lesley@stampintrix.ca if you have any questions. I'm always happy to talk about the company and products I love!


I love how you used the embossing folders!
ReplyDeleteThanks so very much Tamara! 🙂
DeleteOh I really love these cards! Will need to try this myself! Thanks for sharing!
ReplyDeleteYay, good luck and you’re welcome! Thx for visiting 🙂
DeleteSo pretty! What a great way to show off the DSP
ReplyDeleteThx so much Melva! Yes super easy to create 🙂
DeleteLovely Cards. Thanks for Sharing.
ReplyDeleteYou’re welcome, thx for visiting🙂
DeleteLove your cards! I need to try this card!
ReplyDeleteYay! Enjoy and good luck 🙂
DeleteGreat cards Lesley, I love these papers x
ReplyDeleteThank you Kate, yes initially I wasn’t sure until I started to play 🙂 and then it all came together 👏
DeleteLovely cards Lesley, the embossing adds so much texture x
ReplyDeleteThank you so much Mo, thx for visiting and commenting 🙂
DeleteLove these Lesley! Beautiful DSP. Thank you for taking part in our Demonstrator Training Blog Hop this month!
ReplyDeleteThank you Kylie and thx so much for the opportunity to blog hop 😁👏👏🌸🇨🇦
DeleteLove your cards
ReplyDeleteThank you Rookaya! Great to have you visit, thx 🙂
DeleteLove how you showed how to use the dsp to make 2 cards! Thanks for showing the different dsp ideas.
ReplyDelete